The WebAssembly galaxy
The first galaxy that our Rust parser will explore is the WebAssembly (Wasm) galaxy. This post will explain what WebAssembly is, how to compile the parser into WebAssembly, and how to use the WebAssembly binary with Javascript in a browser and with NodeJS.
What is WebAssembly, and why?
If you already know WebAssembly, you can skip this section.
WebAssembly defines itself as:
WebAssembly (abbreviated Wasm) is a binary instruction format for a stack-based virtual machine. Wasm is designed as a portable target for compilation of high-level languages like C/C++/Rust, enabling deployment on the web for client and server applications.
Should I say more? Probably, yes…
WebAssembly is a new portable binary format. Languages like C, C++, or Rust already compiles to this target. It is the spirit successor of ASM.js. By spirit successor, I mean it is the same people trying to extend the Web platform and to make the Web fast that are working on both technologies. They share some design concepts too, but that's not really important right now.
Before WebAssembly, programs had to compile to Javascript in order to run on the Web platform. The resulting files were most of the time large. And because the Web is a network, the files had to be downloaded, and it took time. WebAssembly is designed to be encoded in a size- and load-time efficient binary format.
WebAssembly is also faster than Javascript for many reasons. Despites all the crazy optimisations engineers put in the Javascript virtual machines, Javascript is a weakly and dynamically typed language, which requires to be interpreted. WebAssembly aims to execute at native speed by taking advantage of common hardware capabilities. WebAssembly also loads faster than Javascript because parsing and compiling happen while the binary is streamed from the network. So once the binary is entirely fetched, it is ready to run: No need to wait on the parser and the compiler before running the program.
Today, and our blog series is a perfect example of that, it is possible to write a Rust program, and to compile it to run on the Web platform. Why? Because WebAssembly is implemented by all major browsers, and because it has been designed for the Web: To live and run on the Web platform (like a browser). But its portable aspect and its safe and sandboxed memory design make it a good candidate to run outside of the Web platform (see a serverless Wasm framework, or an application container built for Wasm).
I think it is important to remind that WebAssembly is not here to replace Javascript. It is just another technology which solves many problems we can meet today, like load-time, safety, or speed.
Rust 🚀 WebAssembly

The Rust Wasm team is a group of people leading the effort of pushing Rust into WebAssembly with a set of tools and integrations. There is a book explaining how to write a WebAssembly program with Rust.
With the Gutenberg Rust parser, I didn't use tools like
wasm-bindgen (which is a
pure gem) when I started the project few months ago because I hit some
limitations. Note that some of them have been addressed since then!
Anyway, we will do most of the work by hand, and I think this is an
excellent way to understand how things work in the background. When you
are familiar with WebAssembly interactions, then wasm-bindgen is an
excellent tool to have within easy reach, because it abstracts all the
interactions and let you focus on your code logic instead.
I would like to remind the reader that the Gutenberg Rust parser exposes
one AST, and one root function (the axiom of the grammar),
respectively defined as:
and
;
Knowing that, let's go!
General design
Here is our general design or workflow:
- Javascript (for instance) writes the blog post to parse into the WebAssembly module memory,
- Javascript runs the
rootfunction by passing a pointer to the memory, and the length of the blog post, - Rust reads the blog post from the memory, runs the Gutenberg parser, compiles the resulting AST into a sequence of bytes, and returns the pointer to this sequence of bytes to Javascript,
- Javascript reads the memory from the received pointer, and decodes the sequence of bytes as Javascript objects in order to recreate an AST with a friendly API.
Why a sequence of bytes? Because WebAssembly only supports integers and floats, not strings or vectors, and also because our Rust parser takes a slice of bytes as input, so this is handy.
We use the term boundary layer to refer to this Javascript piece of code responsible to read from and write into the WebAssembly module memory, and responsible of exposing a friendly API.
Now, we will focus on the Rust code. It consists of only 4 functions:
allocto allocate memory (exported),deallocto deallocate memory (exported),rootto run the parser (exported),into_bytesto transform the AST into a sequence of bytes.
The entire code lands here. It is approximately 150 lines of code. We explain it.
Memory allocation
Let's start by the memory allocator. I choose to use wee_alloc for
the memory allocator. It is
specifically designed for WebAssembly by being very small (less than a
kilobyte) and efficient.
The following piece of code describes the memory allocator setup and the
“prelude” for our code (enabling some compiler features, like alloc,
declaring external crates, some aliases, and declaring required function
like panic, oom etc.). This can be considered as a boilerplate:
extern crate gutenberg_post_parser;
extern crate wee_alloc;
extern crate alloc;
use Node;
use Vec;
use ;
static ALLOC: WeeAlloc = INIT;
!
!
// This is the definition of `std::ffi::c_void`, but Wasm runs without std in our case.
The Rust memory is the WebAssembly memory. Rust will allocate and deallocate memory on its own, but Javascript for instance needs to allocate and deallocate WebAssembly memory in order to communicate/exchange data. So we need to export one function to allocate memory and one function to deallocate memory.
Once again, this is almost a boilerplate. The alloc function creates
an empty vector of a specific capacity (because it is a linear segment
of memory), and returns a pointer to this empty vector:
pub extern "C"
Note the #[no_mangle] attribute that instructs the Rust compiler to
not mangle the function name, i.e. to not rename it. And extern "C" to
export the function in the WebAssembly module, so it is “public” from
outside the WebAssembly binary.
The code is pretty straightforward and matches what we announced
earlier: A Vec is allocated with a specific capacity, and the pointer
to this vector is returned. The important part is mem::forget(buffer).
It is required so that Rust will not deallocate the vector once it
goes out of scope. Indeed, Rust enforces Resource Acquisition Is
Initialization
(RAII),
so whenever an object goes out of scope, its destructor is called and
its owned resources are freed. This behavior shields against resource
leaks bugs, and this is why we will never have to manually free memory
or worry about memory leaks in Rust (see some RAII
examples).
In this case, we want to allocate and keep the allocation after the
function execution, hence the mem::forget
call.
Let's jump on the dealloc function. The goal is to recreate a vector
based on a pointer and a capacity, and to let Rust drops it:
pub extern "C"
The Vec::from_raw_parts
function
is marked as unsafe, so we need to delimit it in an unsafe block so
that the dealloc function is considered as safe.
The variable _ contains our data to deallocate, and it goes out of
scope immediately, so Rust drops it.
From input to a flat AST
Now the core of the binding! The root function reads the blog post to
parse based on a pointer and a length, then it parses it. If the result
is OK, it serializes the AST into a sequence of bytes, i.e. it flatten
it, otherwise it returns an empty sequence of bytes.
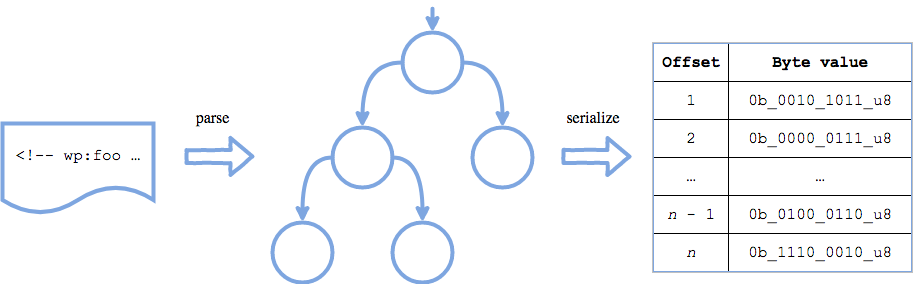
The image illustrates the flow of the data: first off there is a blog post; second there is the AST of the blog post; finally there is a linear byte-encoded representation of the AST of the blog post.
The logic flow of the parser: The input on the left is parsed into an AST, which is serialized into a flat sequence of bytes on the right.
pub extern "C"
The variable input contains the blog post. It is fetched from memory
with a pointer and a length. The variable output is the sequence of
bytes the function will return. gutenberg_post_parser::root(input)
runs the parser. If parsing is OK, then the nodes are compiled into a
sequence of bytes (omitted for now). Then the pointer to the sequence of
bytes is grabbed, the Rust compiler is instructed to not drop it, and
finally the pointer is returned. The logic is again pretty
straightforward.
Now, let's focus on the AST to the sequence of bytes (u8) compilation.
All data the AST hold are already bytes, which makes the process easier.
The goal is only to flatten the AST:
- The first 4 bytes represent the number of nodes at the first level (4
×
u8representsu32) , - Next, if the node is
Block:- The first byte is the node type:
1u8for a block, - The second byte is the size of the block name,
- The third to the sixth bytes are the size of the attributes,
- The seventh byte is the number of node children the block has,
- Next bytes are the block name,
- Next bytes are the attributes (
&b"null"[..]if none), - Next bytes are node children as a sequence of bytes,
- The first byte is the node type:
- Next, if the node is
Phrase:- The first byte is the node type:
2u8for a phrase, - The second to the fifth bytes are the size of the phrase,
- Next bytes are the phrase.
- The first byte is the node type:
Here is the missing part of the root function:
if let Ok = root
And here is the into_bytes function:
What I find interesting with this code is it reads just like the bullet list above the code.
For the most curious, here is the u32_to_u8s function:
Here we are. alloc, dealloc, root, and into_bytes. Four
functions, and everything is done.
Producing and optimising the WebAssembly binary
To get a WebAssembly binary, the project has to be compiled to the
wasm32-unknown-unknown target. For now (and it will change in a near
future), the nightly toolchain is needed to compile the project, so make
sure you have the latest nightly version of rustc & co. installed with
rustup update nightly. Let's run cargo:
The WebAssembly binary weights 22kb. Our goal is to reduce the file size. For that, the following tools will be required:
wasm-gcto garbage-collect unused imports, internal functions, types etc.,wasm-snipto mark some functions as unreachable, this is useful when the binary includes unused code that the linker were not able to remove,wasm-optfrom the Binaryen project, to optimise the binary,gzipandbrotlito compress the binary.
Basically, what we do is the following:
We end up with the following file sizes:
.wasm: 16kb,.wasm.gz: 7.3kb,.wasm.br: 6.2kb.
Neat! Brotli is implemented by most
browsers, so when the client sends
Accept-Encoding: br, the server can response with the .wasm.br file.
To give you a feeling of what 6.2kb represent, the following image also weights 6.2kb:

An image that is as weight as our compressed WebAssembly module.
The WebAssembly binary is ready to run!
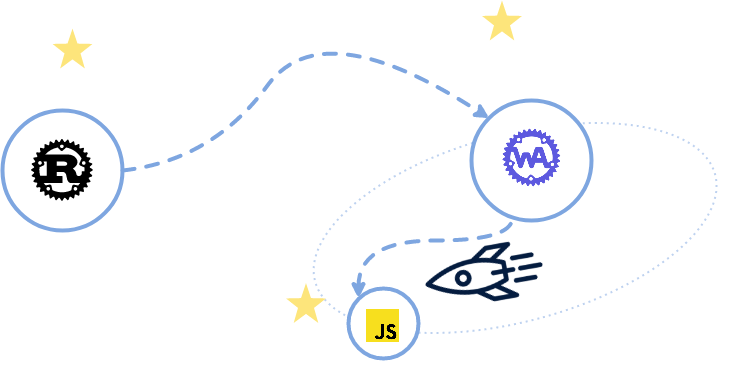
WebAssembly 🚀 Javascript
In this section, we assume Javascript runs in a browser. Thus, what we need to do is the following:
- Load/stream and instanciate the WebAssembly binary,
- Write the blog post to parse in the WebAssembly module memory,
- Call the
rootfunction on the parser, - Read the WebAssembly module memory to load the flat AST (a sequence of bytes) and decode it to build a “Javascript AST” (with our own objects).
The entire code lands here. It is approximately 150 lines of code too. I won't explain the whole code since some parts of it is the “friendly API” that is exposed to the user. So I will rather explain the major pieces.
Loading/streaming and instanciating
The WebAssembly
API
exposes multiple ways to load a WebAssembly binary. The best you can use
is the WebAssembly.instanciateStreaming
function:
It streams the binary and compiles it in the same time, nothing is
blocking. This API relies on the Fetch
API. You
might have guessed it: It is asynchronous (it returns a promise).
WebAssembly itself is not asynchronous (except if you use thread), but
the instanciation step is. It is possible to avoid that, but this is
tricky, and Google Chrome has a strong limit of 4kb for the binary size
which will make you give up quickly.
To be able to stream the WebAssembly binary, the server must send the
application/wasm MIME type (with the Content-Type header).
Let's instanciate our WebAssembly:
;
url, .
object.instance.
;
The WebAssembly binary has been instanciated! Now we can move to the next step.
Last polish before running the parser
Remember that the WebAssembly binary exports 3 functions: alloc,
dealloc, and root. They can be found on the exports property,
along with the memory. Let's write that:
;
Great, everything is ready to write the runParser function!
The parser runner
As a reminder, this function has to: Write the input (the blog post to
parse) in the WebAssembly module memory (Module.memory), to call the
root function (Module.root), and to read the result from the
WebAssembly module memory. Let's do that:
In details:
- The
raw_inputis encoded into a sequence of bytes with theTextEncoderAPI, ininput, - The input is written into the WebAssembly memory module with
writeBufferand its pointer is returned, - Then the
rootfunction is called with the pointer to the input and the length of the input as expected, and the pointer to the output is returned, - Then the output is decoded,
- And finally, the input is deallocated. The output of the parser will
be deallocated in the
readNodesfunction because its length is unknown at this step.
Great! So we have 2 functions to write right now: writeBuffer and
readNodes.
Writing the data in memory
Let's go with the first one, writeBuffer:
In details:
- The length of the buffer is read in
buffer_length, - A space in memory is allocated to write the buffer,
- Then a
uint8view of the buffer is instanciated, which means that the buffer will be viewed as a sequence ofu8, exactly what Rust expects, - Finally the buffer is copied into the memory with a loop, that's very basic, and return the pointer.
Note that, unlike C strings, adding a NUL byte at the end is not
mandatory. This is just the raw data (on the Rust side, we read it with
slice::from_raw_parts, slice is a very simple structure).
Reading the output of the parser
So at this step, the input has been written in memory, and the root
function has been called so it means the parser has run. It has returned
a pointer to the output (the result) and we now have to read it and
decode it.
Remind that the first 4 bytes encodes the number of nodes we have to read. Let's go!
In details:
- A
uint8view of the memory is instanciated… more precisely: A slice of the memory starting atstart_pointer, - The number of nodes is read, then all nodes are read,
- And finally, the output of the parser is deallocated.
For the record, here is the u8s_to_u32 function, this is the exact
opposite of u32_to_u8s:
And I will also share the readNode function, but I won't explain the
details. This is just the decoding part of the output from the parser.
Note that this code is pretty simple and easy to optimise by the Javascript virtual machine. It is almost important to note that this is not the original code. The original version is a little more optimised here and there, but they are very close.
And that's all! We have successfully read and decoded the output of the
parser! We just need to write the Block and Phrase classes like
this:
The final output will be an array of those objects. Easy!
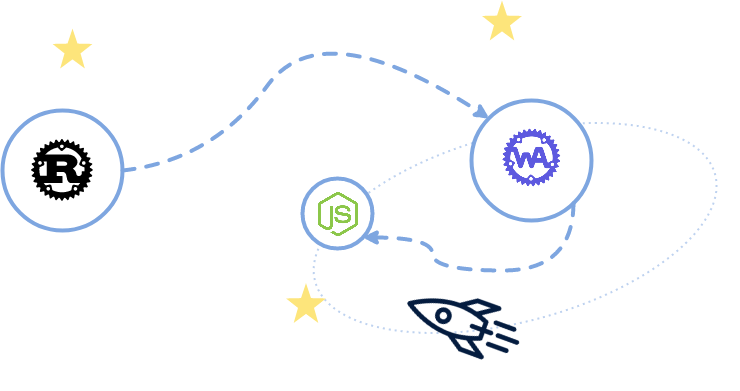
WebAssembly 🚀 NodeJS
The differences between the Javascript version and the NodeJS version are few:
- The
FetchAPI does not exist in NodeJS, so the WebAssembly binary has to be instanciated with a buffer directly, like this:WebAssembly.instantiate(fs.readFileSync(url), {}), - The
TextEncoderandTextDecoderobjects do not exist as global objects, they are inutil.TextEncoderandutil.TextDecoder.
In order to share the code between both environments, it is possible to
write the boundary layer (the Javascript code we wrote) in a .mjs
file, aka ECMAScript Module. It allows to write something like
import { Gutenberg_Post_Parser } from './gutenberg_post_parser.mjs'
for example (considering the whole code we wrote before is a class). On
the browser side, the script must be loaded
with<script type="module" src="…" />, and on the NodeJS side, node
must run with the --experimental-modules flag. I can recommend you
this talk Please wait… loading: a tale of two loaders by Myles
Borins
at the JSConf EU 2018 to understand all the story about that.
Conclusion
We have seen in details how to write a real world parser in Rust, how to compile it into a WebAssembly binary, and how to use it with Javascript and with NodeJS.
The parser can be used in a browser with regular Javascript code, or as a CLI with NodeJS, or on any platforms NodeJS supports.
The Rust part for WebAssembly plus the Javascript part totals 313 lines of code. This is a tiny surface of code to review and to maintain compared to writing a Javascript parser from scratch.
Another argument is the safety and performance. Rust is memory safe, we know that. It is also performant, but is it still true for the WebAssembly target? The following table shows the benchmark results of the actual Javascript parser for the Gutenberg project (implemented with PEG.js), against this project: The Rust parser as a WebAssembly binary.
| Document | Javascript parser (ms) | Rust parser as a WebAssembly binary (ms) | speedup |
|---|---|---|---|
demo-post.html | 13.167 | 0.252 | × 52 |
shortcode-shortcomings.html | 26.784 | 0.271 | × 98 |
redesigning-chrome-desktop.html | 75.500 | 0.918 | × 82 |
web-at-maximum-fps.html | 88.118 | 0.901 | × 98 |
early-adopting-the-future.html | 201.011 | 3.329 | × 60 |
pygmalian-raw-html.html | 311.416 | 2.692 | × 116 |
moby-dick-parsed.html | 2,466.533 | 25.14 | × 98 |
Benchmarks between Javascript parser and Rust parser as a WebAssembly binary.
The WebAssembly binary is in average 86 times faster than the actual
Javascript implementation. The median of the speedup is 98. Some edge
cases are very interesting, like moby-dick-parsed.html where it takes
2.5s with the Javascript parser against 25ms with WebAssembly.
So not only it is safer, but it is faster than Javascript in this case. And it is only 300 lines of code.
Note that WebAssembly does not support SIMD yet: It is still a proposal. Rust is gently supporting it (example with PR #549). It will dramatically improve the performances!
We will see in the next episodes of this series that Rust can reach a lot of galaxies, and the more it travels, the more it gets interesting.
Thanks for reading!